

127.0.0.1:3000; the desktop app connects through SSH. You don’t need to expose Zenflow over HTTP or HTTPS. If you need browser access through a public URL instead, see Public HTTPS VPS setup.
For a VM you can already SSH into, follow Connect an existing Ubuntu VM. For a VM without a public IP, see the Google Cloud IAP example first.
Connect an existing Ubuntu VM
- Install Zenflow on your laptop and update it to version 2.5.1 or later.
-
Confirm that SSH works from your laptop to the VM. You need an Ubuntu VM, a non-root account with
sudo, and an SSH destination such asuser@host(or an alias in~/.ssh/config). -
SSH into the VM as the account that will run Zenflow, then install Zenflow in private mode:
stablechooses the release channel (betais also available).--access=privatekeeps the service on loopback without setting up Caddy or opening ports 80/443.--non-interactiveskips the optional API key prompt; sign in from the desktop app instead. The services run as the account that invokedsudo, with application data under that account’s~/.zenflow. Do not run the installer from a root login. -
Check that the services and health endpoint are available on the VM:
-
In the desktop app on your laptop, open Settings → Experimental, enable Remote hosts, and save.

-
Under Add host, enter the VM’s SSH destination (
user@host, oruser@your-ssh-alias) and SSH port (22unless you configured another port). Select the VM from the host switcher in the title bar.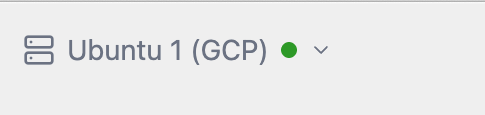
- Once connected, sign in, connect GitHub if needed, and create a project and task on the remote host. Install and authenticate Claude Code, Codex, and any other agents you want to run on the VM separately; local agent installations and subscriptions do not transfer to it. Zenflow can run tasks without choosing a workflow: enter a task description or paste a task link and select an executor.
Private mode does not require opening port 3000 in the VM’s firewall. SSH is the only route from the laptop to the service, including when SSH uses a bastion or an IAP tunnel.
Example: Create a private Google Cloud VM
This optional example uses a GCP Ubuntu 24.04 VM with no public IP. ReplaceYOUR_PROJECT_ID, YOUR_SUBNET, YOUR_ZONE, jdoe, the VM name, and the SSH key path with your own values. IAP tunneling requires the appropriate GCP permissions and a firewall rule allowing IAP TCP forwarding to the VM on port 22; arrange those prerequisites before connecting. These commands assume metadata-based SSH keys; if your project enforces OS Login, configure access through OS Login instead.
-
Create the VM (from a terminal with
gcloudauthenticated): -
Add your laptop’s public SSH key for the Linux account:
-
Add an SSH alias to
~/.ssh/configon your laptop, replacing the project and zone with the same values as above:On macOS, you can also addUseKeychain yes. Verify the connection from your laptop:If SSH returns4003: failed to connect to backend, check that the VM has finished starting: -
Follow Connect an existing Ubuntu VM, using
ssh gcp-jdoe-devto log in to the VM asjdoe. In the desktop app, enterjdoe@gcp-jdoe-devas the SSH destination and22as the port. The app uses your SSH configuration, including the IAPProxyCommand. Keep port 3000 closed in the GCP firewall.
Updates and limitations
Thezenflow-update.timer service checks for updates about every 30 minutes and installs them when no task is running. On the VM, inspect its logs with sudo journalctl -u zenflow-update.
To change the update channel of an existing install, set UPDATE_CHANNEL=stable or UPDATE_CHANNEL=beta in /etc/zenflow/env. Do not rerun the installer just to switch channels: it installs the requested release immediately, even if that release is older than the installed version. An older server might not be able to open a database migrated by a newer version.
Remote hosts are generally available but still marked experimental in Settings. Some in-app links may not be clickable, and Open in local IDE/Finder cannot open a remote project folder on your laptop.